目录
CSS布局
常见布局(PC)
- 固定宽度布局
- 弹性(fluid)布局
- 响应式布局 —— 多终端(PC、Pad、Phone)
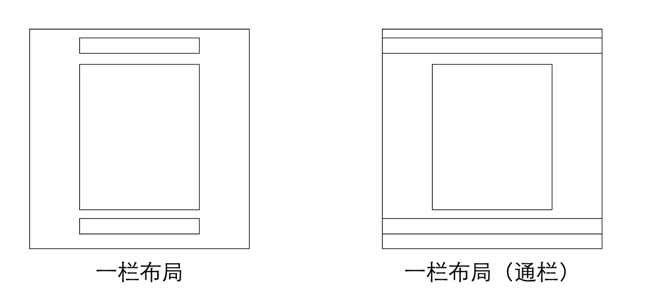
单列布局
如何实现
定宽
width: 1000px; 或 max-width: 1000px;
水平居中
margin-left: auto; margin-right: auto;
范例
范例
注意 max-width和width的区别
<style>
  .layout{
  /*   width: 960px; */
    max-width: 960px;
    margin: 0 auto;
  }
  #header{
    height: 60px;
    background: red;
  }
  #content{
    height: 400px;
    background: blue;
  }
  #footer{
    height: 50px;
    background: yellow;
  }
</style>
<div class="layout">
  <div id="header">头部</div>
  <div id="content">内容</div>
  <div id="footer">尾部</div>
</div>
进化
省标签,便于控制局部 范例
<style>
  .layout{
    width: 960px;
    margin: 0 auto;
  }
  #header{
    height: 60px;
    background: red;
  }
  #content{
    height: 400px;
    background: blue;
  }
  #footer{
    height: 50px;
    background: yellow;
  }
</style>
<div id="header"  class="layout">头部</div>
<div id="content" class="layout">内容</div>
<div id="footer" class="layout">尾部</div>
通栏
给通栏加背景色 范例
<style>
  .layout{
    width: 960px;
    margin: 0 auto;
  }
  #header{
    height: 60px;
    background: red;
  }
  #content{
    height: 400px;
    background: blue;
  }
  #footer{
    height: 50px;
    background: yellow;
  }
</style>
<div id="header">
  <div class="layout">头部</div>
</div>
<div id="content" class="layout">内容</div>
<div id="footer">
  <div class="layout">尾部</div>
</div>
查看范例效果,能发现不完美的地方吗?
通栏优化
给 body 设置min-width 去掉滚动背景色 bug
<style>
  .layout{
    width: 960px;
    margin: 0 auto;
  }
  body{
    min-width: 960px;
  }
  #header{
    height: 60px;
    background: red;
  }
  #content{
    height: 400px;
    background: blue;
  }
  #footer{
    height: 50px;
    background: yellow;
  }
</style>
<div id="header">
  <div class="layout">头部</div>
</div>
<div id="content" class="layout">内容</div>
<div id="footer">
  <div class="layout">尾部</div>
</div>
内部元素水平居中
.parent{text-align:center;}
.child{display: inline-block;}
IE 6 不支持 inline-block (为什么用下面的写法)
.child{*display: inline; *zoom: 1;}
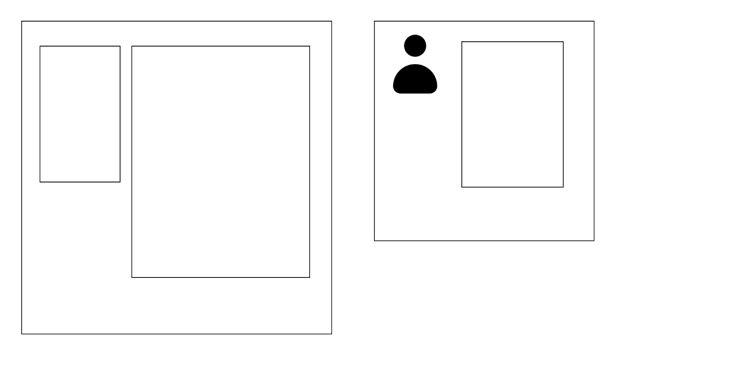
双列布局
一列固定宽度,另外一列自适应宽度
如何实现
浮动元素 + 普通元素margin 范例
  <style>
    #content:after{
      content: '';
      display: block;
      clear: both;
    }
    .aside{
      width: 200px;
      height: 500px;
      background: yellow;
      float: left;
    }
    .main{
      margin-left: 210px;
      height: 400px;
      background: red;
    }

    #footer{
      background: #ccc;
    }

  </style>
  <div id="content">
    <div class="aside">aside</div>
    <div class="main">content</div>
  </div>
  <div id="footer">footer</div>
如果侧边栏在右边呢?
侧边栏在右
谨记页面元素的渲染顺序 范例
  <style>
    #content:after{
      content: '';
      display: block;
      clear: both;
    }
    .aside{
      width: 200px;
      height: 500px;
      background: yellow;
      float: right;
    }
    .main{
      margin-right: 210px;
      height: 400px;
      background: red;
    }

    #footer{
      background: #ccc;
    }

  </style>

  <div id="content">
    <div class="aside">aside</div>
    <div class="main">content</div>
  </div>
  <div id="footer">footer</div>
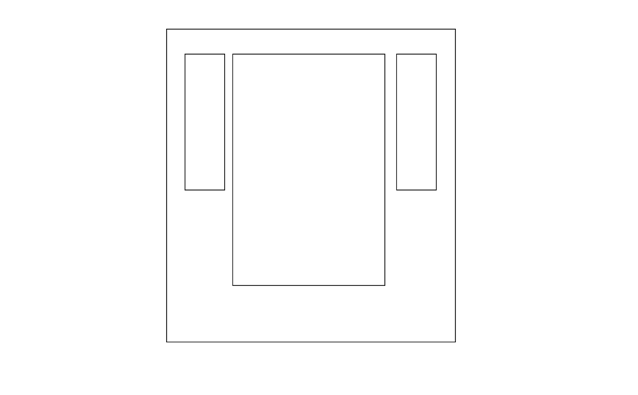
三列布局
两侧两列固定宽度,中间列自适应宽度
如何实现
    #content:after{
      content: '';
      display: block;
      clear: both;
    }
    .menu{
      width: 100px;
      height: 500px;
      background: pink;
      float: left;
    }
    .aside{
      width: 200px;
      height: 500px;
      background: yellow;
      float: right;
    }
    .main{
      margin-left: 110px; /*为什么要加margin-left*/
      margin-right: 210px;
      height: 400px;
      background: red;
    }

    #footer{
      background: #ccc;
    }

  <div id="content">
    <!-- 为什么不是main在前面 -->
    <div class="menu">aside</div>
    <div class="aside">aside</div>
    <div class="main">content</div>
  </div>
  <div id="footer">footer</div>
浮动 vs 负margin
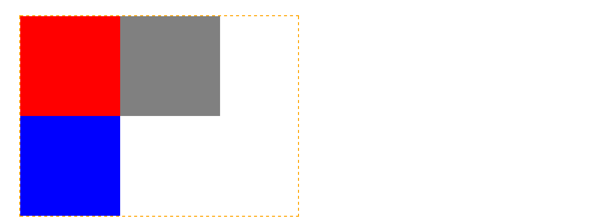
对于相邻的两个浮动元素,如果因为空间不够导致第二个浮动元素下移,可以通过给第二个浮动元素设置 margin-left: 负值 来让第二个元素上移,其中 负值 大于等于元素上移后和第一个元素重合的临界值
三个浮动元素
最后一个浮动元素使用了负边距
范例演示
范例 想想最后一个元素为什么要设置为 -20px?
.float{
    overflow:hidden;
    width:280px;
    border:dashed 1px orange;
}

.float .item{
    width:100px;
    height:100px;
    float:left;
}

.float .item:nth-child(1){
    background:red;
}
.float .item:nth-child(2){
    background:grey;
}
.float .item:nth-child(3){
    background:blue;
    margin-left: -20px;  /* 为什么这里是 -20px ??*/
}
</style>

<div class="float">
    <div class="item"></div>
    <div class="item"></div>
    <div class="item"></div>
</div>
水平等距排列
<style>
ul,li{
  margin: 0;
  padding: 0;
  list-style: none;
}
.ct{
    overflow:hidden;
    width: 640px;
    border:dashed 1px orange;
    margin: 0 auto;
}

.ct .item{
    float:left;
    margin-left: 20px;
    margin-top: 20px;
    width:200px;
    height:200px;
    background: red;
}
.ct>ul{
  margin-left: -20px;
}

</style>
<div class="ct">
  <ul>
    <li class="item">1</li>
    <li class="item">2</li>
    <li class="item">3</li>
    <li class="item">4</li>
    <li class="item">5</li>
    <li class="item">6</li>
    <li class="item">7</li>
    <li class="item">8</li>
  </ul>
</div>
圣杯布局
why it?
- 是三列布局,两边固定宽度,中间自适应
- 中间内容元素在 dom 元素次序中优先位置
实现
按照注释编号,一行行实现观察效果 范例
  <style>
    #content:after{
      content: '';        /*8*/
      display: block;     /*8*/
      clear: both;        /*8*/
    }
    #content{
      padding-left: 100px;  /*5*/
      padding-right: 150px; /*5*/
    }
    .aside, .main, .extra{
      float: left;         /*2*/
    }

    .aside{
      width: 100px;        /*1*/
      height: 300px;       /*1*/
      background: red;     /*1*/

      margin-left: -100%;  /*4*/
      position: relative;  /*6*/
      left: -100px;        /*6*/
    }
    .extra{
      width: 150px;        /*1*/
      height: 300px;       /*1*/
      background: yellow;  /*1*/

      margin-left: -150px; /*5*/
      position: relative;  /*7*/
      left: 150px;         /*7*/

    }
    .main{
      height: 350px;       /*1*/
      background: blue;    /*1*/

      width: 100%;         /*3*/
    }

  </style>

  <div id="content">
    <div class="main">main</div>
    <div class="aside">aside</div>
    <div class="extra">extra</div>
  </div>
缺点
.mian的最小宽度不能小于.aside的宽度
why?
双飞翼布局
按照注释编号,一行行实现观察效果 范例
解决了什么问题?
  <style>

    #content:after{
      content: '';        /*8*/
      display: block;     /*8*/
      clear: both;        /*8*/
    }
    #content{

    }
    .aside, .main, .extra{
      float: left;         /*2*/
    }

    .aside{
      width: 100px;        /*1*/
      height: 300px;       /*1*/
      background: red;     /*1*/

      margin-left: -100%;  /*4*/

    }
    .extra{
      width: 150px;        /*1*/
      height: 300px;       /*1*/
      background: yellow;  /*1*/

      margin-left: -150px; /*5*/


    }
    .main{
      /* background: blue;  */   /*第1步添加,第7步注释掉*/
      /* height: 350px;  */      /*第1步添加,第7步注释掉*/

      width: 100%;         /*3*/
    }

    .wrap{
      margin-left: 100px;  /*6*/
      margin-right: 150px; /*6*/
      background: blue;    /*7*/
      height: 350px;       /*7*/

    }

  </style>

  <div id="content">
    <div class="main">
      <div class="wrap">main</div>
    </div>
    <div class="aside">aside</div>
    <div class="extra">extra</div>
  </div>


